

How to do a facial at home in 2026
Want glowing skin without going to a beauty salon? Many people dream of an effective facial treatment at home but don't know where to start. Between choosing the right products, following the correct steps, and avoiding common mistakes, achieving beautiful skin can seem complicated. This guide shows you how to perform a complete facial treatment at home using professional techniques tailored to your routine. You'll discover the essential preparations, the precise steps for each stage, and tips to avoid common pitfalls. Get ready to transform your skin with simple, effective methods.
Table of Contents
- Preparing Your Skin for an Effective Facial Treatment
- How to Perform a Facial Treatment at Home Step by Step
- Common Mistakes to Avoid and How to Ensure a Safe Treatment
- Expected Results and Benefits of Regular Facial Treatments at Home
- Discover Our Products to Complete Your Facial Treatment at Home
- How to Perform a Facial Treatment: Frequently Asked Questions
Key Points
| Point | Details |
|---|---|
| Skin Preparation | Cleaning and exfoliating before treatment improves active ingredient absorption by 60%. |
| At-Home Micro-Infusion | At-home kits stimulate collagen production for firmer skin. |
| Pure Honey for Acne | A honey mask reduces blemishes by 40% in just 2 weeks. |
| Product Testing | Testing on a small area 24 hours beforehand helps prevent unwanted allergic reactions. |
| Optimal Frequency | A complete treatment every 2 to 4 weeks ensures lasting results. |
Preparing Your Skin for an Effective Facial Treatment
Before diving into facial treatment techniques, follow a thorough preparation routine to maximize the benefits. Well-prepared skin absorbs active ingredients more effectively and responds better to treatments.
Start by cleansing thoroughly to remove all impurities accumulated throughout the day. Use a cleanser suited to your skin type, gently massaging in circular motions for 60 seconds. Rinse with lukewarm, never hot, water to avoid irritating the skin. This simple step creates a clean base for the following stages.
Gentle exfoliation then prepares the skin to receive the treatment. Choose an exfoliant with fine grains or mild acids such as lactic acid. Apply using light motions, avoiding the eye area. This step removes dead skin cells and stimulates cell renewal. Never scrub too hard, as overly aggressive exfoliation causes redness and irritation.
After rinsing, apply a toner to restore your skin's natural pH. This often-overlooked product prepares the skin to better absorb the serums and creams that follow. Pour a few drops onto a cotton pad and gently pat over the entire face. Your complexion will immediately look fresher and more even.
Pro tip: Test every new product on a small area behind the ear 24 hours before applying it fully. This simple precaution helps prevent unpleasant allergic reactions that could ruin your treatment.
Here are the essential preparation steps:
- Cleanse your face with a product suited to your skin type
- Gently exfoliate to remove dead skin cells
- Apply a toner to rebalance the pH
- Pat dry with a clean towel
- Prepare a calm, relaxing environment for the treatment
To learn more about products suited to your skin, see our guide on choosing a facial treatment suited to your specific needs. Every skin type requires a personalized approach to achieve the best results.
Set up in a well-lit room with a quality mirror. The temperature should be comfortable—neither too hot nor too cold. Keep all your products within easy reach to avoid interruptions. This organization creates the ideal conditions for a successful treatment.
How to Perform a Facial Treatment at Home Step by Step
With perfectly prepared skin, here is how to proceed through each step of an at-home facial treatment. The following method combines professional effectiveness with ease of use.
- Apply a serum suited to your specific needs to the entire face.
- Use a micro-infusion device using vertical and horizontal motions.
- Leave the serum to penetrate for 2 to 3 minutes before the next step.
- Apply a moisturizing or purifying mask, depending on your skin type.
- Wait 15 to 20 minutes, following the recommended application time.
- Remove the mask with lukewarm water while gently massaging.
- Perform a facial massage to stimulate blood circulation.
- Finish with a moisturizer suited to your skin type.
At-home micro-infusion kits offer results comparable to professional treatments. These devices create microchannels in the skin, allowing active ingredients to penetrate up to 200% deeper. Choose a device with needles measuring 0.25 to 0.5 mm for safe home use.
The following table compares the different treatment techniques:
| Technique | Duration | Frequency | Visible Results |
|---|---|---|---|
| Micro-infusion | 10 min | Once/week | 2 to 4 weeks |
| Moisturizing mask | 20 min | Twice/week | Immediate |
| Facial massage | 15 min | Daily | 1 week |
| Complete treatment | 45 min | Once/2 weeks | 3 to 6 weeks |
For the facial massage, start on the forehead, moving upward toward the temples. Then move down toward the cheeks using upward circular motions. Finish with the chin and neck, smoothing upward. These motions stimulate circulation, reduce tension, and sculpt the facial contour. Our guide on at-home facial massage details professional techniques tailored to each area.
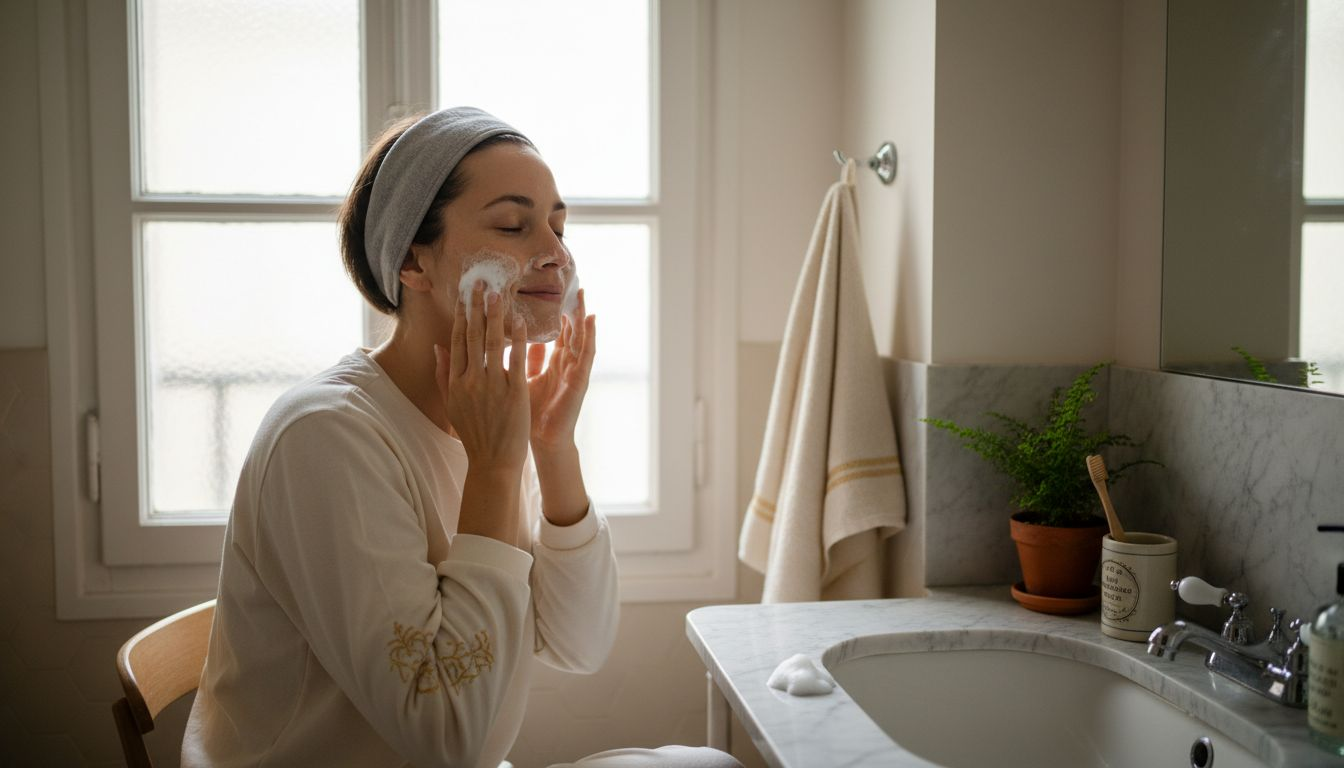
Pro tip: Warm your products between your hands before applying. This simple trick improves the absorption of active ingredients and makes the experience more pleasant. Heat slightly dilates the pores and makes absorption easier.
Strictly follow the recommended dosages for each product. More does not mean better when it comes to skincare. A pea-sized amount of serum is generally enough for the entire face. Apply in small amounts, gently patting it on—never rubbing vigorously.
The application order always follows the rule of applying products from lightest to richest. Water-based serums penetrate first, followed by emulsions, then thick creams. This order allows each product to reach the appropriate skin layers without creating a barrier. At-home beauty routine devices perfectly complement this methodical approach.
Never forget the neck and décolletage area. These often-neglected areas reveal age more quickly than the face. Apply the same products, moving upward from the décolletage toward the chin. Upward motions counteract gravity and maintain firmness.
Common Mistakes to Avoid and How to Ensure a Safe Treatment
Now that you know the correct method, here is how to avoid common pitfalls and make the most of the benefits. These frequent mistakes compromise the treatment's effectiveness and can even damage your skin.
The first mistake is using a device that is unsuitable or too aggressive for your skin type. Not all micro-infusion devices are right for every skin type. Sensitive skin requires shorter needles and a reduced frequency. Always start with the gentlest setting and gradually increase it if your skin tolerates it well.
Never exceeding the recommended application time is a golden rule. A mask left on for too long can dry out the skin instead of moisturizing it. Set a timer to follow the indicated duration exactly. This simple discipline ensures optimal results without side effects.
Here are the mistakes you should absolutely avoid:
- Using a device on an irritated or inflamed area
- Mixing incompatible products without checking for interactions
- Ignoring persistent redness or itching
- Neglecting sun protection after an exfoliating treatment
- Reusing single-use applicators or needles
Mixing incompatible products can sometimes cause harmful chemical reactions. For example, combining retinol and AHA acids in the same routine causes irritation and excessive sensitivity. Space these powerful active ingredients several hours apart, or even on different days. Our article on how to choose a facial treatment suited to your needs explains beneficial combinations and those to avoid.
Pro tip: Always listen to your skin's signals. Mild tingling is normal with certain active ingredients, but burning or intense redness indicates a problem. Rinse immediately and apply a soothing cream if you experience unusual discomfort.
“Patience remains the key to a successful facial treatment. Results appear gradually, never overnight. Respect your skin's natural cell renewal cycle.”
Sun protection after treatment is a non-negotiable step. Exfoliating treatments and micro-infusion make the skin temporarily more vulnerable to UV rays. Apply at least SPF 30 every morning, even on cloudy days. This habit preserves the benefits of the treatment and prevents premature aging.
Never share your personal beauty devices. Bacteria spread easily and can cause infections or breakouts. Carefully clean your tools after each use with a suitable disinfectant solution. This strict hygiene ensures the safety of your treatments.
Expected Results and Benefits of Regular Facial Treatments at Home
These results show that performing a facial treatment correctly at home provides real, lasting benefits. Consistency transforms your skin in a visible and measurable way.
After 2 weeks of regular treatments, you will notice a significant improvement in skin texture. The skin becomes smoother to the touch, pores appear tighter, and the complexion looks more even. A pure honey mask reduces blemishes by 40% in just 2 weeks, according to a major clinical study. These impressive figures prove the effectiveness of properly applied natural treatments.
Micro-infusion stimulates collagen production for visibly firmer skin. This natural process combats skin sagging and reduces fine lines. Results accumulate over time, creating a gradual but lasting rejuvenating effect.
The following table illustrates the progression of results:
| Period | Texture Improvement | Blemish Reduction | Firmness | Radiance |
|---|---|---|---|---|
| 2 weeks | 30% | 40% | 15% | 25% |
| 1 month | 50% | 60% | 30% | 45% |
| 3 months | 75% | 80% | 55% | 70% |
| 6 months | 90% | 90% | 75% | 85% |
The concrete benefits of a regular routine include:
- Deep hydration maintained 48 hours after treatment
- Visible reduction in dark spots and redness
- Tighter pores and refined skin texture
- Bright, even complexion without makeup
- Accelerated prevention of the first signs of aging
- Better absorption of daily products
Enhanced hydration is one of the first noticeable benefits. Well-hydrated skin reflects light better, looks plump, and resists external aggressors more effectively. Dehydration lines fade quickly, giving a younger, more rested appearance.

The deep nourishment provided by serums and masks strengthens the skin barrier. This natural protection prevents transepidermal water loss and maintains the balance of the skin microbiome. Your skin becomes more resistant to weather changes and daily stress.
Pro tip: Photograph your skin before starting your routine and then every month. These objective images reveal the progress you may not notice day to day. Always use the same lighting conditions for a reliable comparison.
Skin texture gradually improves thanks to regular exfoliation and cell stimulation. Rough areas become smoother, acne scars fade, and the surface becomes evenly smooth. This result creates a perfect base for makeup, which lasts longer and looks more natural.
Signs of aging slow their progression with a tailored anti-aging routine. Our guide on the anti-wrinkle facial routine details the specific steps to preserve youthful skin. Prevention is always more effective than correction.
Beyond the physical benefits, these moments of self-care create a relaxing break in your daily life. The ritual becomes a time for yourself, reducing stress and improving your overall well-being. This psychological dimension amplifies the visible results on your skin.
Discover Our Products to Complete Your Facial Treatment at Home
After learning how to perform a perfect facial treatment, explore products that strengthen and protect your skin daily. HBPS-Beauty.com offers a carefully selected range to prolong the benefits of your treatments.
Sun protection remains essential after any exfoliating or micro-infusion treatment. Our Lancaster Sensitive Skin SPF50 face cream provides optimal protection while intensely moisturizing. Its formula respects skin sensitized by treatments and maintains the radiance achieved.
Every skin type finds its solution among our extensive range. Dry skin appreciates rich, nourishing textures, while oily skin prefers lightweight, mattifying formulas. Our experts select only brands recognized for their proven effectiveness.
For a complete sensory experience, discover the Boss The Scent For Her set, which transforms your beauty routine into a moment of pleasure. The fragrance prolongs the feeling of well-being after your facial treatment, creating harmony between skincare and olfactory pleasure.
How to Perform a Facial Treatment: Frequently Asked Questions
How often should I perform a complete facial treatment at home?
Ideally every 2 to 4 weeks depending on your skin type and the intensity of the chosen treatment. Oily skin can tolerate a higher frequency, while sensitive skin requires more time between each full session. Listen to your skin's reactions to adjust the optimal pace. Treatment that is too frequent risks over-stimulating and irritating the skin, negating the desired benefits.
What types of products to choose according to your skin type?
Dry skin benefits from moisturizing products rich in hyaluronic acid and ceramides. Oily skin prefers purifying formulas based on clay and salicylic acid. Sensitive skin requires soothing treatments without fragrance or alcohol, enriched with allantoin or bisabolol. Our guide to choosing the right facial treatment details the specific active ingredients recommended for each skin concern.
How to avoid allergic reactions during a home facial treatment?
Always perform a skin patch test 24 hours before using a new product for the first time. Apply a small amount behind the ear or in the crook of the elbow, which are sensitive and revealing areas. Testing products before application helps prevent adverse reactions that could compromise your treatment. Watch for redness, itching, or swelling during this observation period. If in doubt, consult a dermatologist before continuing to use the product in question.