

At-home hair removal guide: methods and care by area
In short:
- For at-home hair removal, choose wax, sugar, or an electric epilator depending on your preference. The ideal hair length is between 2 and 5 millimeters for an effective and less painful result. Some sensitive areas, such as the full bikini line or the back, require a salon treatment to avoid the risk of irritation or burns.
For hair removal at home, the rule is simple: choose wax or sugar paste for long-lasting results on large areas, an electric epilator if you want to avoid using disposables, and shaving or hair removal cream only for quick touch-ups. The ideal hair length for waxing or using an epilator is between 2 and 5 mm for good adhesion and clean removal. Anything shorter means the wax won't grip; anything longer makes removal more painful and increases the risk of the hair breaking.
Some situations where a salon remains the best option:
- Full bikini line: difficult angle, very sensitive skin, risk of burns or severe irritation without experience.
- Back and inaccessible areas: impossible to control the skin tension on your own.
- Skin conditions (active eczema, psoriasis, recent scars): consult a dermatologist before any hair removal.
Table of Contents
- Which at-home hair removal method really suits you?
- How to wax at home, step by step?
- How to use an electric epilator without hurting yourself?
- Hair removal creams and shaving: when to use them and when to avoid them?
- What aftercare to use after hair removal to avoid irritation?
- Which method to choose depending on the area of the body?
- How to safely prepare homemade sugaring wax?
- When is at-home hair removal not recommended?
- Key points
- What most guides don't tell you about at-home hair removal
- Hbps-beauty helps you get equipped for uncompromising at-home hair removal
Which at-home hair removal method really suits you?
Before choosing, compare the methods based on what matters: how long the results last, pain, suitable areas, and frequency.
| Method | How long results last | Pain | Recommended areas | Frequency |
|---|---|---|---|---|
| Hot wax | 3–4 weeks | Moderate to high | Legs, underarms, bikini line | Every 3–4 weeks |
| Cold wax strips | 2–3 weeks | Moderate | Legs, touch-ups | Every 3–4 weeks |
| Sugaring wax (sugar) | 3–4 weeks | Low to moderate | Bikini line, face, sensitive skin | Every 3–4 weeks |
| Electric epilator | 2–4 weeks | Moderate (decreases with familiarity) | Legs, underarms, bikini line | Every 2–4 weeks |
| Hair removal cream | 5–10 days | None | Legs, underarms | Depending on regrowth |
| Shaving | 1–7 days | None | All areas | Depending on regrowth |
| At-home IPL | Gradual reduction | Low | Legs, underarms, bikini line | Sessions spaced out over several months |
Here is what each method actually offers, and its real limitations.
- Hot wax: most effective on thick hair and large areas. Requires a wax heater and a little practice to get the temperature right. Clean and long-lasting results.
- Cold wax strips: convenient for travel and occasional touch-ups. They adhere less well to fine or thick hair, but require no equipment to heat.
- Sugaring wax (sugar paste): adheres mainly to the hair, not the skin, which reduces irritation. Rinses off with warm water. Ideal for sensitive skin and the bikini line.
- Electric epilator: an initial investment, but no disposables afterward. The pain decreases significantly after several uses. To understand how these devices work, a technical guide can be helpful before purchasing.
- Hair removal cream: painless and fast, but not suitable for thick hair or sensitive skin. Hair grows back in just a few days.
- Shaving: the fastest, but regrowth is quickly visible and the risk of ingrown hairs is higher on areas prone to friction.
- At-home IPL: gradually reduces hair over several months of regular sessions. High investment, but semi-permanent results on light skin with dark hair.
How to wax at home, step by step?
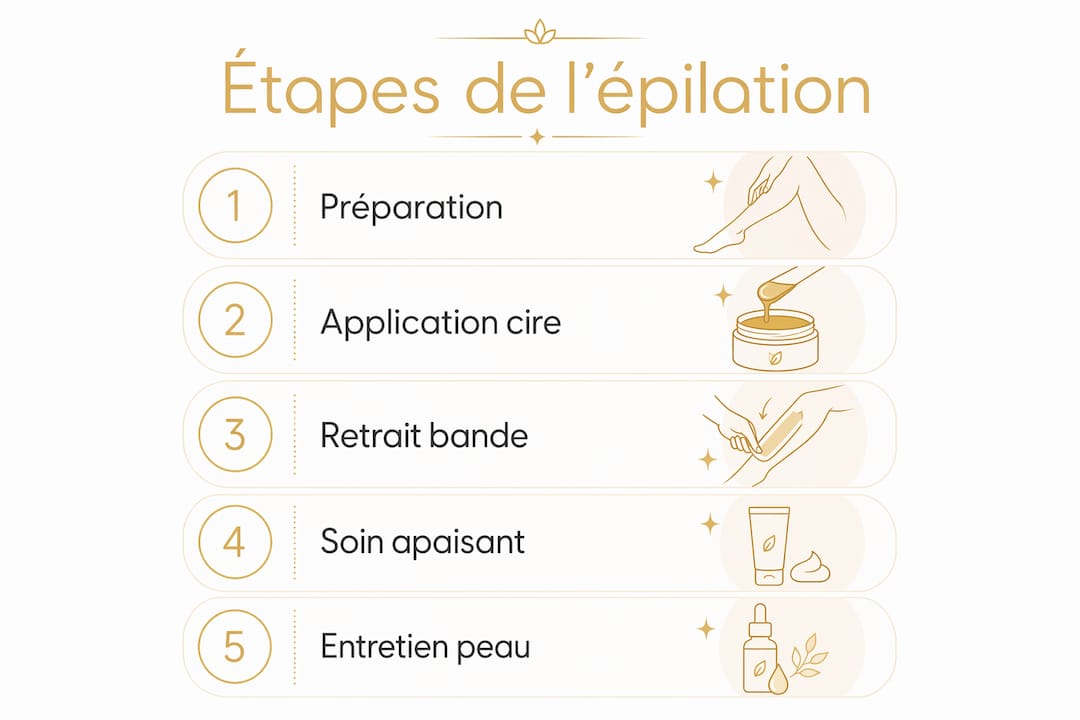
Wax remains the go-to method for long-lasting at-home hair removal. Here is the complete protocol, applicable to hot wax from a pot, roll-on wax, and wax strips.
Skin preparation
- Exfoliate 24 to 48 hours before the session, never right before. A gentle scrub removes dead skin cells and frees hairs that might otherwise become ingrown. On the day, the skin must be clean, dry, and free of body oils (no cream or oil).
- Check the hair length: 2 to 5 mm. If it is too short, the wax won't grip. If it is too long, removal will be more painful and the hair may break halfway down rather than coming out at the root.
- Dust the area to be removed with talc or starch to absorb residual moisture and improve adhesion.
Application and removal
- Test the temperature of the wax on the inside of your wrist. It should be warm but comfortable, never scalding. A kitchen thermometer is useful for properly managing the temperature.
- Apply the wax in the direction of hair growth, in a thin, even layer. If it is too thin, it won't grip; if it is too thick, it will be difficult to remove.
- For hot wax with a strip: place the strip, smooth it firmly two or three times in the direction of hair growth, then remove it in one swift motion, parallel to the skin, never pulling upwards. Stretch the skin with your free hand at the moment of removal.
- For peel-off wax (without a strip): let it harden for a few seconds, lift a corner, and remove it in the same way, keeping it flat against the skin.
- For roll-on wax: apply it directly to the area, place the provided strip, smooth it, and remove it using the same principle.
Never go over the same area twice during one session. If some hairs resist, wait until the next session.
Pro tip: Always stretch the skin with your free hand at the moment of removal. This reduces pain and prevents bruising, especially on soft areas like the inner thighs.
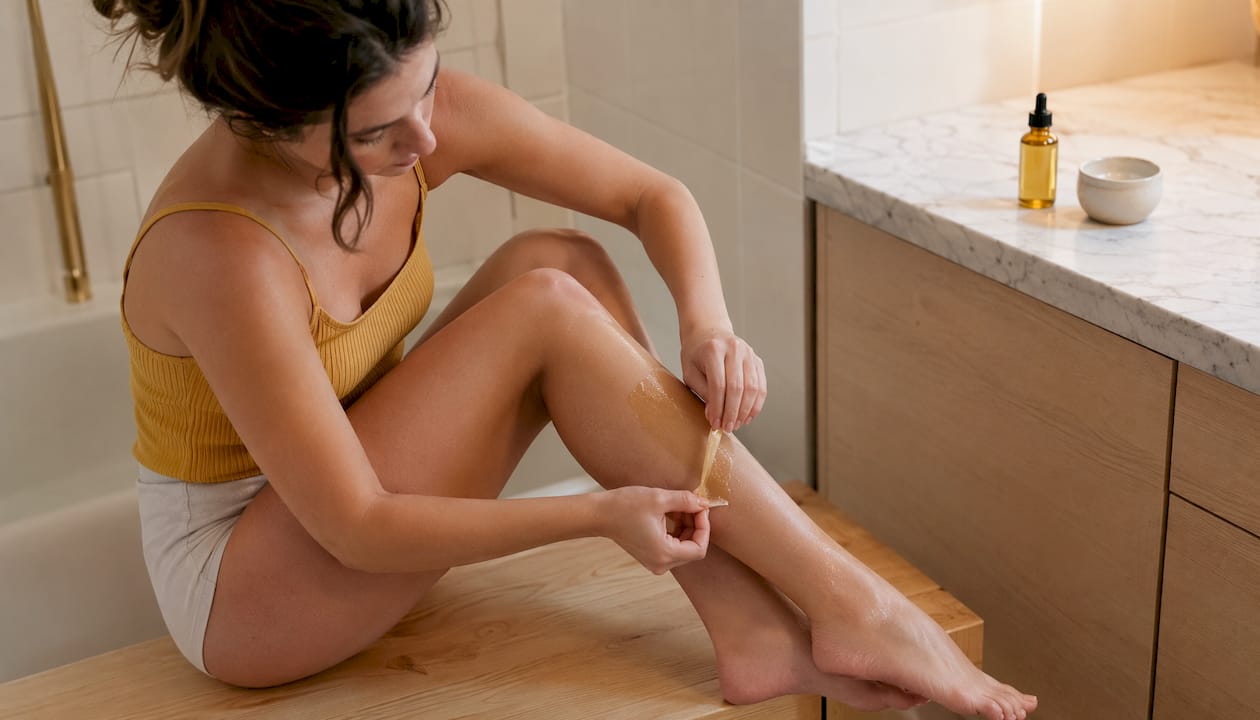
After removal, immediately apply a post-hair removal oil or soothing gel to calm the skin and remove wax residue.
How to use an electric epilator without hurting yourself?
An electric epilator pulls the hair out by the root using a series of rotating tweezers. The pain is real at first, but it decreases significantly after 3 to 4 sessions, once the follicles have become accustomed.
Preparation:
- Exfoliate 24 to 48 hours before, as with wax.
- Ideal hair length: 2 to 5 mm. Anything shorter means the tweezers won't grip well.
- If your device is waterproof, use it in a warm shower: the heat opens the pores and significantly reduces the pulling sensation.
Usage technique:
- Stretch the skin with your free hand, especially on soft areas.
- Move the epilator slowly and steadily. Moving too quickly cuts the hair instead of pulling it out, which promotes ingrown hairs and results in uneven regrowth.
- Hold the device perpendicular to the skin, at a 90-degree angle, so that the tweezers grip the hair at the base.
- Work in small sections rather than sweeping across the entire leg at once.
Preventing ingrown hairs:
- Resume gentle exfoliation 48 hours after the session, then once or twice a week.
- Moisturize daily with a non-comedogenic lotion.
- If you are prone to ingrown hairs, a product containing salicylic acid (BHA) applied occasionally helps unclog obstructed follicles, to be introduced gradually.
Expected results: the skin remains smooth for 2 to 4 weeks depending on the area and hair type. Hair grows back faster under the arms than on the legs.
Hair removal creams and shaving: when to use them and when to avoid them?
These two methods have their place in an at-home hair removal routine, but only in specific situations.
Hair removal cream: safe procedure
- Perform a patch test 24 hours before the first use on a small area of the arm. Some formulas contain chemical agents (calcium thioglycolate) that can cause allergic reactions.
- Apply a generous layer without rubbing, and strictly follow the indicated waiting time (usually 5 to 10 minutes). Exceeding this time irritates the skin without improving the result.
- Rinse thoroughly with warm water and pat dry without rubbing.
- Avoid using it on skin that has recently been tanned, irritated, or damaged.
Shaving: the basic rules
- Always use a clean and sharp blade. A dull blade pulls the hair instead of cutting it, which causes redness and ingrown hairs.
- Shave in the direction of hair growth on sensitive areas (bikini line, underarms) to limit irritation. Shaving against the grain gives a cleaner result but increases the risk of ingrown hairs.
- Moisturize immediately afterward with an alcohol-free lotion.
Limitations to be aware of:
- Regrowth is visible in 1 to 7 days for shaving, and in 5 to 10 days for hair removal cream.
- Frequent shaving on the underarms or bikini line promotes ingrown hairs and chronic irritation.
- Hair removal creams are not suitable for sensitive skin if used too regularly: alternate with other methods.
Reserve these two options for occasional touch-ups, not as the main routine on sensitive areas.
What aftercare to use after hair removal to avoid irritation?
Post-hair removal skin is temporarily weakened: the follicles are open, and the surface is sensitive. What you do in the following 48 hours largely determines how comfortable the coming days will be.
In the first 24 hours:
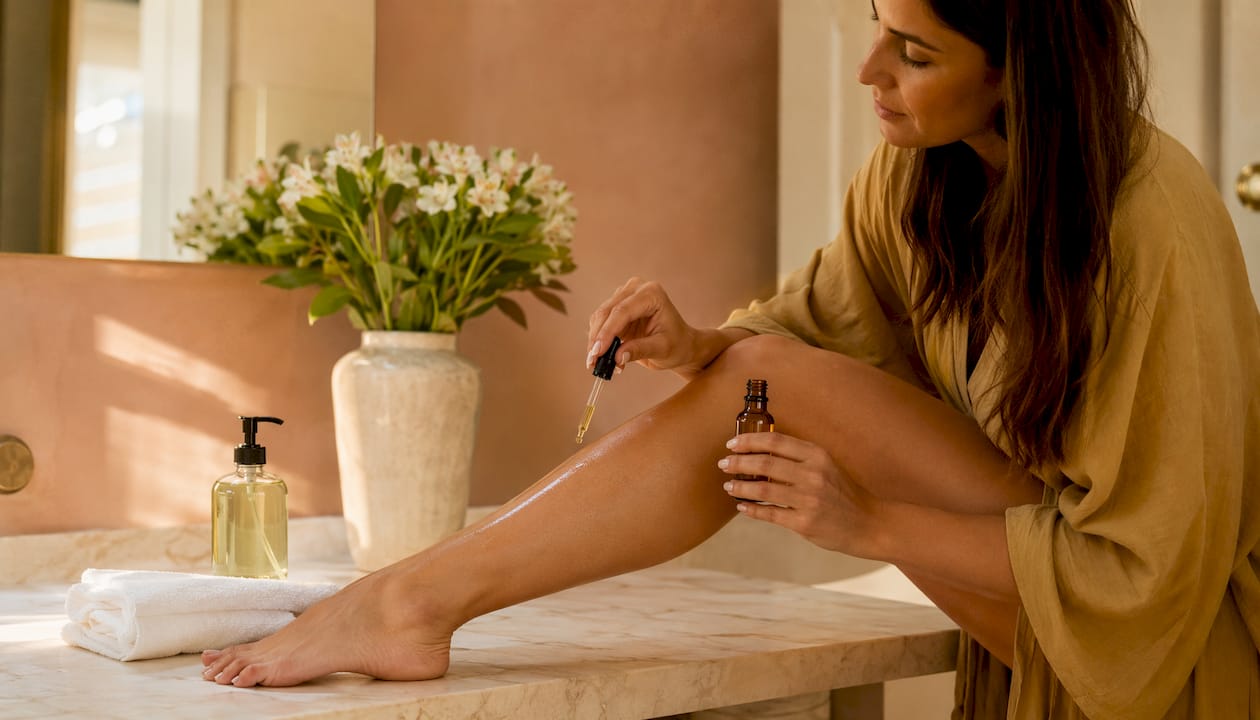
- Apply a soothing gel with aloe vera or panthenol immediately after the session.
- Avoid saunas, hot baths, intense exercise, and direct sun exposure. Heat dilates the blood vessels and amplifies redness.
- Do not use alcohol-based deodorant on epilated underarms: alcohol burns on freshly epilated skin.
- Wear loose clothing made of natural fibers to avoid friction.
From 48 hours onward:
- Resume gentle exfoliation and moisturize daily with a non-comedogenic lotion.
- Light exfoliation once or twice a week to prevent ingrown hairs in the long term.
- For skin prone to ingrown hairs, gradually incorporate a treatment with AHA (glycolic acid) or BHA (salicylic acid) into your weekly routine. These active ingredients dissolve the dead skin cells that block the hair from emerging. For more information on suitable skincare routines, the at-home skincare guide by Hbps-beauty details the steps for each skin type.
Warning signs: redness that persists beyond 48 hours, increasing pain, local heat, pus, or fever. These signs indicate a follicular infection: consult a doctor without delay.
Which method to choose depending on the area of the body?
Each area has its own constraints: hair thickness, skin sensitivity, and accessibility. Here are the practical recommendations.
Legs: hot wax remains the standard. Use large strips, stretch the skin well, and work in sections. An electric epilator also works very well, especially for maintenance between two wax sessions. Frequency: every 3 to 4 weeks.
Underarms: a sensitive and curved area that is difficult to stretch. Sugaring wax (sugar) or a small roll-on gives good results. Exfoliate regularly afterward to prevent ingrown hairs, which are common in this area due to friction. Avoid daily shaving if your skin is reactive.
Bikini line: for a simple bikini line (the line), small hot wax strips or sugar paste work well. For a Brazilian or full bikini line, the angle is difficult to master on your own, and the risk of severe irritation is real. Entrust these areas to a salon, at least for the first few times. Tips for successful professional hair removal can also prepare you for what the aesthetician does differently.
Face: enhanced precautions are mandatory. Prefer tweezers for eyebrows, threading (hair removal with thread) for the upper lip and fine hair, or a warm wax specifically designed for the face. Always test on a small area 24 hours before. Avoid standard hot wax on the face: the skin is thinner there, and the risk of burns or skin tearing is higher.
Back and inaccessible areas: without outside help, it is impossible to control the skin tension and the removal angle. Always entrust these areas to a professional, for reasons of safety as well as results.
How to safely prepare homemade sugaring wax?
Homemade sugar paste is one of the gentlest methods available: it adheres only to the hair, rinses off with warm water, and requires no chemical products. Its preparation requires precision, but the result is worth the effort.
Proportions and cooking
The classic proportions: approximately 55% white sugar, 35% fresh lemon juice, and 10% water. For a quantity usable on the legs, allow 200 g of sugar, 60 ml of lemon juice, and 30 ml of water.
Mix in a heavy-bottomed saucepan over medium heat. Stir until the sugar has dissolved, then cook without stirring. The mixture must reach 106 to 112°C: below this, the paste will not hold its shape; above 120°C, it will harden too much and become unusable. A kitchen thermometer is essential. The color should turn golden amber, like light caramel.
Pour into a glass jar and let cool. For application, the paste must be warmed to a maximum of around 45°C: always test it on the inside of your wrist before bringing it near a sensitive area.
Application and removal
The technique for Oriental wax is the opposite of that for regular wax in one key way: you apply it in the direction of hair growth and also remove it in the direction of hair growth (not against it). This reduces breakage and irritation.
- Take a small amount of paste, form it into a ball, and spread it over the area, pressing firmly.
- Remove it in one firm motion, parallel to the skin and in the direction of hair growth.
- Rinse off any residue with warm water: no solvent is needed.
Storage: keep in an airtight jar at room temperature for up to two weeks. To reheat, warm it in the microwave or a water bath for a few seconds, then mix and check the temperature before use.
Precautions: never leave the saucepan unattended while cooking. In case of a burn, cool it immediately under cold water for 10 minutes and seek medical attention if the burn is larger than 2 cm or if blisters appear.
When is at-home hair removal not recommended?
Certain situations make at-home hair removal risky, regardless of the method.
Absolute or relative contraindications:
- Broken skin, recent sunburn, or sunburn: wax removes weakened skin cells, not just the hair.
- Photosensitizing medications (certain antibiotics, topical retinoids, isotretinoin): the skin may react unpredictably to heat and hair removal.
- Active skin infections (folliculitis, herpes, shingles): hair removal spreads the infection.
- Uncontrolled diabetes or severe circulatory disorders: impaired healing and increased risk of infection.
- At-home IPL devices during pregnancy: manufacturers generally advise against using them; always check your device's instructions.
Warning signs after a session:
- Redness that lasts longer than 48 hours.
- Pain that increases rather than decreases.
- Local heat, swelling, pus, or fever: signs of a follicular infection that require medical treatment.
When to choose a salon:
- Full Brazilian, back, or areas with scars or a history of shingles.
- If you need permanent hair removal or long-lasting reduction: consult medical clinics offering Nd:YAG laser or electrolysis, the only methods recognized as permanent.
This guide provides general information. For any specific medical condition, consult a dermatologist or healthcare professional before starting a hair removal routine.
Key points
Choosing the right method for the area, preparing the skin 24 to 48 hours beforehand, and properly caring for it after the session are the three pillars of successful, complication-free at-home hair removal.
| Point | Details |
|---|---|
| Hair length | Check that it is 2–5 mm long before each session for optimal adhesion and clean removal. |
| Mandatory preparation | Exfoliate 24–48 hours beforehand; the skin must be clean and dry on the day, with no oils or creams. |
| Method by area | Hot wax for the legs, sugar wax or roll-on wax for sensitive areas, tweezers or threading for the face. |
| Post-session care | Apply a soothing gel immediately; avoid heat and sun for 24 hours, and gently exfoliate again after 48 hours. |
| Hbps-beauty | Offers wax heaters, hair removal devices, and post-hair removal care products so you can equip yourself at home without compromising on quality. |
What most guides don't say about at-home hair removal
Most articles on at-home hair removal focus on the removal technique. This is useful, but it is the simplest part. What really makes a difference is what happens before and after the session.
Pre-hair removal exfoliation is always mentioned but rarely explained. Its role is not just to "prepare the skin": it frees hairs growing beneath a layer of dead skin cells which, without this step, will be removed halfway or become ingrown in the following days. On the underarms and bikini area, where friction is constant, this step is not optional.
The other blind spot: frequency. Many people remove their hair too often, convinced that visible regrowth justifies another session. However, spacing sessions 3 to 4 weeks apart respects the hair growth cycle and allows the hair to be removed at the root rather than halfway through its growth. Removing hair too frequently weakens the follicle and makes results less defined over time.
Finally, regarding Oriental wax: many people perceive it as a "natural and gentle" method without really understanding why. The reason is mechanical. The sugar paste adheres to the hair, not the skin. The result: less pulling on the skin, less irritation, and much better tolerance for reactive skin. This is also why it is removed in the direction of hair growth, unlike regular wax. This detail makes all the difference in how it feels.
In my opinion, for the vast majority of people, a good wax heater and homemade sugar paste cover 80% of their needs. An electric hair removal device can then be used for maintenance between sessions. Shaving and creams have their place, but as backup options, not as a primary routine.
Hbps-beauty helps you equip yourself for uncompromising at-home hair removal
Choosing the right equipment radically changes the experience: a wax heater that maintains a stable temperature, an epilator with heads designed for sensitive areas, or a roll-on kit for beginners can make all the difference between a frustrating session and clean results.

Hbps-beauty offers a selection of at-home hair removal devices designed for people who want long-lasting results without going to a salon. Three criteria to check before buying: temperature regulation (essential for avoiding burns), the included accessories (spatulas, strips, interchangeable heads), and how easy the device is to clean. To complete your routine, complementary products such as Beauty Focus MultiBeauty Pharmanex support skin quality between sessions. Browse the Hbps-beauty store to find the equipment right for your area and budget, and order directly from hbps-beauty.com.
Useful sources for further reading
- Institut Massag: a comprehensive guide to each method, including recommendations by area, frequency, and professional tips for difficult areas.
- Jardin de la Beauté Institut: homemade wax recipe and technique, with a step-by-step protocol for Oriental wax, post-hair removal care, and benefits for sensitive skin.
- Senskin: natural homemade wax recipe, with technical data on cooking (106–112°C) and application (45°C max) temperatures.
- Journal des Femmes: at-home hair removal instructions, including tips for using an electric epilator and preventing ingrown hairs.
- Beauteshop.com: maintenance and extended care, including an anti-ingrown hair routine, exfoliation, and post-hair removal hydration.
- Bleu Libellule: long-lasting waxing techniques, comparing hot wax, cold strips, and roll-on wax, along with how long results last.