

At-Home Hair Removal Workflow: Step-by-Step Method
An effective at-home hair removal routine consists of four steps: prepare the skin, choose the method best suited to the area, perform the treatment using the correct technique, and then immediately soothe the skin. Follow this sequence to avoid most irritations, minor burns, and ingrown hairs that discourage so many people.
Pre-treatment checklist:
- Hair at the correct length (3–5 mm for wax or sugar paste)
- Patch test completed 24–48 hours beforehand (wax, sugar, hair removal cream)
- Wax temperature checked on the inside of the wrist
- Clean and ready equipment (spatulas, strips, soothing gel)
- Soothing treatment available for after the treatment
Warning signs not to ignore: irritated or damaged skin, use of photosensitizing medications (certain antibiotics, retinoids), or recent tanning if you use an IPL device. In these cases, postpone the treatment or consult a dermatologist.
Pro tip: Take ibuprofen 30 minutes beforehand if you are particularly sensitive to pain—it can reduce the inflammatory reaction, but first check that there are no contraindications for you.
Table of Contents
- Which hair removal methods can you use at home?
- What equipment do you need for each method?
- How to prepare your skin before hair removal
- Waxing: detailed procedure for each type
- How to use an electric epilator effectively
- Shaving and hair removal creams: quick guide
- Is at-home IPL really effective?
- How to adapt the treatment to the area being treated
- What treatments to apply after hair removal
- How to reduce pain during hair removal
- How long do the results last and what budget should you expect?
- Contraindications and warning signs to know
- What to do when things don't go as planned
- What beauty professionals say
- Key points
- Is at-home hair removal really worth it?
- Where to find a reliable hair removal kit to get started
- Useful sources and references
Which hair removal methods can you use at home?
The methods available at home cover a wide range, from the fastest to the longest-lasting. Here are the main types and their key features:
- Razor: results last 1–3 days, painless, risk of nicks, and rapid regrowth. Ideal for quick touch-ups.
- Hair removal cream: results last 4–7 days, painless, but a chemical reaction is possible. Avoid on sensitive skin without a patch test.
- Cold wax strips: results last 2–4 weeks, convenient for travel, but often provide a less precise result than hot wax. Zero risk of burns.
- Hot / warm wax: results last 2–4 weeks, superior adhesion, requires a wax heater and temperature control.
- Roll-on wax: easy to apply in the right amount for beginners, primarily for legs and arms, results last 2–4 weeks.
- Sugar paste (Oriental wax): results last 2–4 weeks, water-soluble, gentler on sensitive skin because it adheres more to the hair than to the skin.
- Electric epilator: results last 2–4 weeks, one-time investment, learning curve during the first 3–4 sessions.
- Home IPL (Intense Pulsed Light): gradual reduction after 4–12 sessions, effective on Fitzpatrick types I–IV, ineffective on light-colored hair or very tanned skin.
When choosing: sensitive areas (bikini line, face) are best suited to sugar paste or cold strips. Large areas (legs) tolerate hot wax or an epilator well. Razors and hair removal creams are suitable for quick touch-ups or skin that does not tolerate hair removal by pulling.
Pro tip: No method is universally superior—always adapt your choice to the area, the nature of the hair, and your pain tolerance.
What equipment do you need for each method?
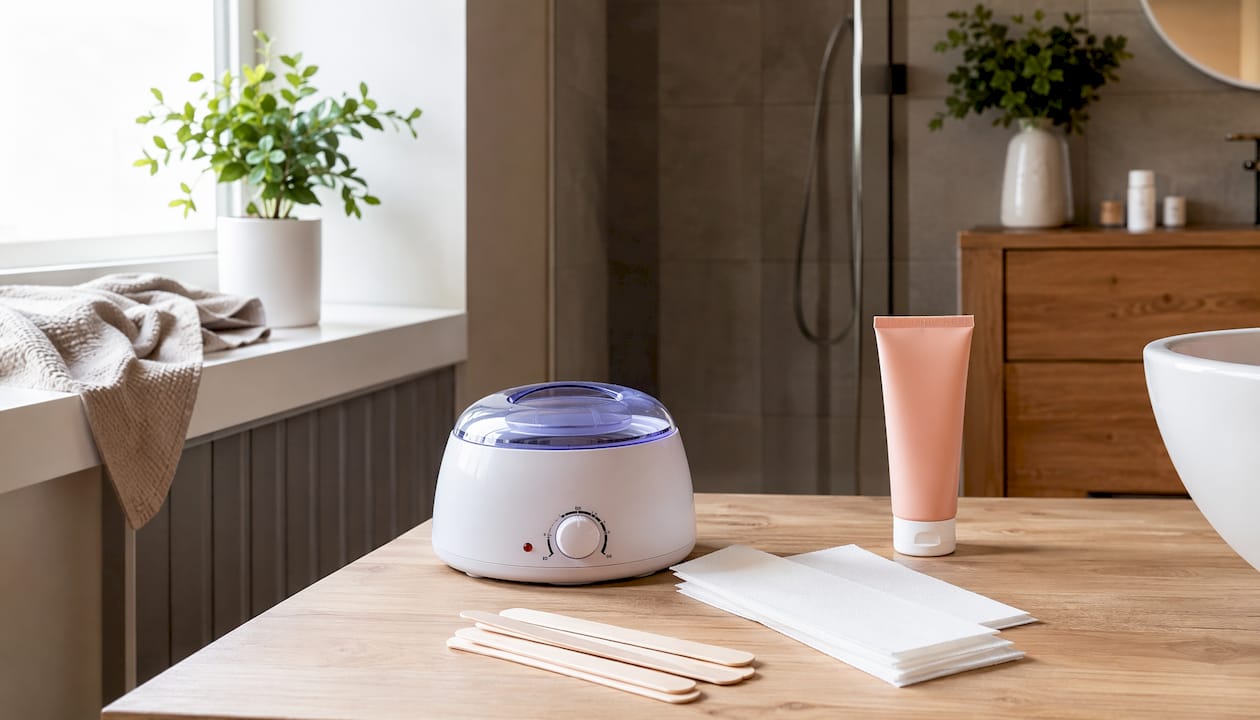
Having everything at hand before you start avoids interruptions and sloppy application. Here is what you need depending on the method you choose.
| Method | Essential equipment | Useful accessories |
|---|---|---|
| Hot wax | Wax heater, jar or cartridge wax, wooden spatulas | Thermometer, talc, pre-wax lotion |
| Roll-on wax | Roll-on wax heater, cartridge refills | Talc, post-wax lotion |
| Cold strips | Ready-to-use strips | Cleansing oil for residue |
| Sugar paste | Pot, sugar/lemon/water, optional fabric strips | Thermometer, talc, bowl of warm water |
| Electric epilator | Epilator, heads adapted to the area | Exfoliating mitts, soothing gel |
| Razor | Sharp razor, shaving foam | Replacement blade, moisturizing cream |
| Hair removal cream | Cream, removal spatula | Timer, alcohol-free soothing gel |
| Home IPL | IPL device, protective goggles | Razor (preparation), soothing gel |
General accessories for all methods:
- Clean compresses and aloe vera gel for after the treatment
- Round-tip scissors to trim the hair length if necessary
- Mild antiseptic in case of micro-lesions
- Disposable gloves for hygiene
Regarding the budget: consumables (strips, wax, spatulas) represent a moderate recurring cost, while an electric epilator or IPL device pays for itself over several years. A complete wax heater kit with accessories remains significantly less expensive than a series of salon appointments.
How to prepare your skin before hair removal
Preparation directly determines the quality of the result and the level of pain. Here are the steps in order.
- 48 hours before: gentle exfoliation. Exfoliate 24–48 hours before hair removal, never just before. Exfoliating too close to the treatment weakens the skin barrier and increases redness. A bristle mitt or a gentle enzymatic exfoliant is sufficient.
- 24–48 hours before: patch test. Apply a small amount of wax, sugar paste, or hair removal cream to the inside of your forearm. Wait 24 hours. Persistent redness or itching = do not use this product on your body.
- The day before: moisturize. Well-hydrated skin is more supple and withstands pulling better. Apply a light oil-free cream the evening before the treatment.
- On the day: warm shower, clean and dry skin. No oil or cream on the area to be treated. Moisture and oil prevent the wax from adhering properly. A light dusting of talc can help on areas that sweat.
- Check the hair length. Between 3 and 5 mm for wax and sugar paste. Too short: the wax won't grip. Too long: pulling is more painful and the hair may break.
- Get comfortable. Good lighting, a stable surface, all equipment within reach. For the bikini line or armpits, a second person can help hold the skin taut.
Pro tip: Avoid retinoids and acids (AHA, BHA) on the areas to be treated in the 48 hours beforehand. These active ingredients thin the skin and increase the risk of epidermal tearing.
Waxing: detailed procedure for each type
Hot wax: the 6 steps
- Heat the wax in a wax heater until it reaches a fluid and even consistency.
- Test the temperature on the inside of your wrist. It should be warm but bearable, never burning. For sugar paste, aim for 40–45°C.
- Apply a thin layer in the direction of hair growth, using a clean wooden spatula. Do not cover too large an area at once.
- Apply the fabric strip (for oil-soluble wax) and press it firmly in the direction of hair growth.
- Remove in one quick motion parallel to the skin, against the direction of hair growth, while holding the skin taut with the other hand. The speed of removal is crucial: a slow motion pulls less effectively and hurts more.
- Soothe immediately with a cold compress or an azulene post-wax lotion.
Never reapply wax to an area that has already been treated during the same session. The skin is weakened after the first pass; a second pull in the same place can cause a micro-lesion or a superficial burn.
Practical variations
Cold strips: rub them between your palms for 20–30 seconds to warm the wax, peel off both sides, apply in the direction of hair growth, and remove in one quick motion against the hair growth. An ideal solution for quick touch-ups without equipment, but the result is less precise than with hot wax.
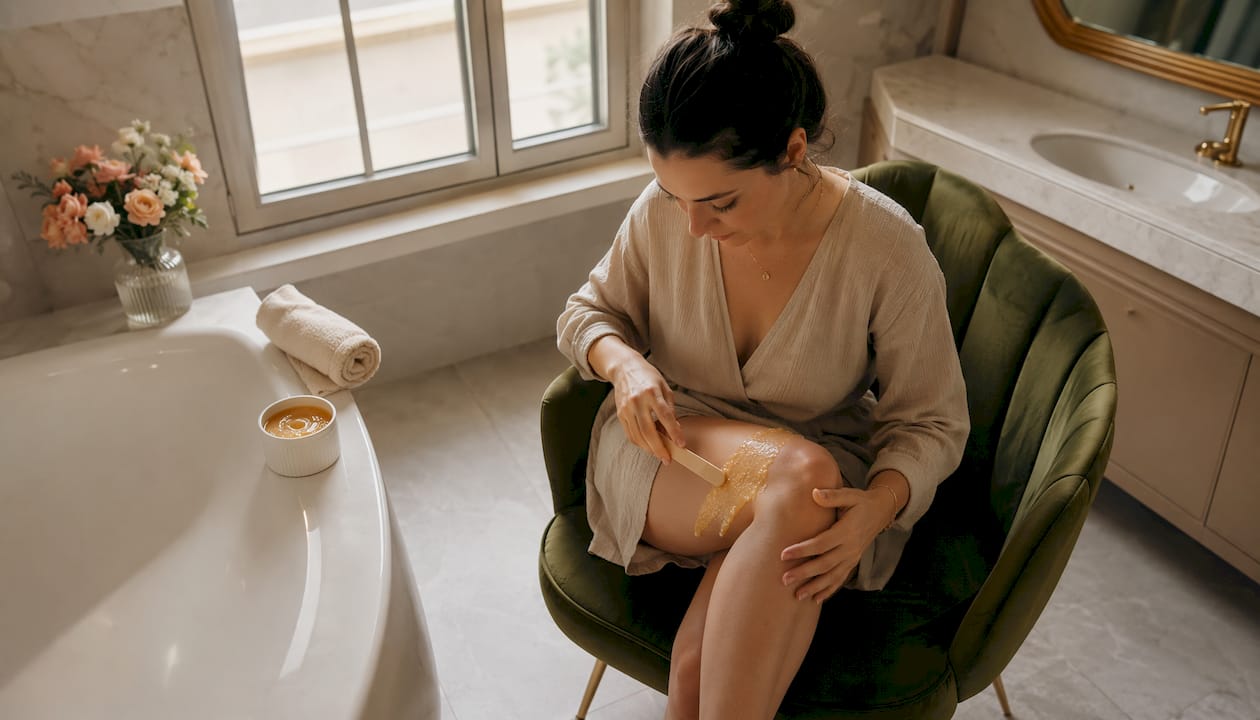
Roll-on: glide the rollerball directly over the skin in an even layer. The cartridge heats in its dedicated holder. Particularly suited for beginners on the legs and arms, as the dosage is automatic.
Peelable wax (film): applied without a strip, removed by lifting an edge and pulling parallel to the skin. Practical for small areas and precision areas.
Sugar paste (Oriental wax): made from sugar, water, and lemon juice, it is water-soluble and adheres more to the hair than to the skin, making it gentler. Technical peculiarity: it is applied against the direction of hair growth and removed in the direction of growth, the opposite of classic wax. Residue is washed off with warm water.
How to use an electric epilator effectively
The electric epilator pulls the hair by the root using rotating tweezers. The first sessions are more painful; after 3–4 uses, regrowth becomes finer and the sensation decreases significantly.
- Positioning: hold the device perpendicular to the skin, at 90°, and move it slowly against the direction of hair growth.
- Hold the skin taut with the other hand to make it easier for the tweezers to grip and reduce pain, especially on soft areas (inner thighs, armpits).
- Work by area: legs in horizontal sections, armpits with the arm raised, bikini line in small passes.
- Adapted heads: use the wide head for the legs, the precision head for the armpits and bikini line. Some devices offer a shower mode, which is more comfortable because warm water relaxes the follicles.
- Maintenance: clean the head after each session with the provided brush or with water if the model allows. Store the device in its pouch to protect the tweezers.
To limit ingrown hairs, gently exfoliate 48 hours after the session and moisturize daily between treatments. Modern home hair removal devices often include speed settings and massage accessories to reduce discomfort.
Pro tip: For the first sessions, start with the calves—a less sensitive area—before tackling the thighs or armpits. You will learn the correct angle and speed without getting discouraged.
Shaving and hair removal creams: quick guide
These two methods do not involve pulling. They are suitable for quick touch-ups and skin that does not tolerate pain.
For irritation-free shaving:
- Apply a generous layer of shaving foam to damp skin.
- Shave in the direction of hair growth for sensitive areas (bikini line, armpits), and against the hair growth on the legs if you want a closer shave.
- Use a clean razor and change it regularly. A dull blade pulls on the hair instead of cutting it.
- Rinse with cold water to close the pores, then apply an alcohol-free moisturizing cream.
For hair removal creams:
- A patch test is mandatory 24 hours beforehand, even if you have already used the brand.
- Strictly follow the indicated waiting time (generally 5–10 minutes depending on the area and brand). Exceeding this time increases the risk of a chemical burn.
- Rinse thoroughly with warm water, then moisturize.
- Never apply to mucous membranes, irritated areas, or damaged skin.
Shaving results in regrowth in 1–3 days, hair removal cream in 4–7 days. Neither weakens the hair bulb, unlike pulling methods.
Do / avoid:
- ✓ Change the blade every 5–7 uses
- ✓ Moisturize after every shave
- ✗ Shave on dry skin without foam
- ✗ Leave the hair removal cream on longer than recommended
- ✗ Scratch cream residue off with your fingernails
Is at-home IPL really effective?
IPL (Intense Pulsed Light) targets the melanin in the hair to gradually destroy the follicle. It works well on light to medium skin types (Fitzpatrick I–IV) with dark hair. On blonde, red, or white hair, and on very tanned skin, effectiveness is significantly reduced.
Typical protocol:
- Shave the area the day before (never wax before an IPL session).
- Clean and dry the skin carefully.
- Set the intensity to the recommended level for your skin type (start low and increase gradually).
- Test on a small area and wait 24 hours to check for any reaction.
- Treat the entire area by moving the device without overlapping passes.
- Apply a soothing gel after the session.
Realistic timeline: plan for one session every 2–4 weeks, for 4–12 sessions depending on the area and hair density. The reduction is not immediate. Most users notice a visible decrease after the 3rd or 4th session, with annual maintenance of 1–2 sessions.
IPL contraindications: pregnancy, photosensitizing medications, recently tanned skin, tattoos on the treated area, certain skin conditions. Read your device's instructions and, if in doubt, consult a dermatologist.
Pro tip: Never treat the eye contour, eyebrows, or genital areas with a home IPL device. Home beauty devices achieve 60–70% of the effectiveness of a professional device—real results, but they require consistency.
What adjustments are needed for each area to be hair removed?
Each area has its own characteristics. Here are the essential points to avoid the most common mistakes.
Bikini line:
- Prefer sugar paste or cold strips for reactive skin.
- Hair at least 3–5 mm long; a patch test is essential.
- Work in small sections, with the skin pulled taut.
- Avoid IPL on highly pigmented areas without testing first.
Underarms:
- Lift the arm and stretch the skin with the other hand.
- Work in small areas (the skin is uneven).
- For very sensitive skin, cold strips or a razor remain the least aggressive options.
- Wait 24 hours before applying deodorant after waxing.
Legs:
- Work in sections (calf, knee, thigh) to maintain the wax temperature.
- Stretch the skin over the knee and ankle, areas where it folds.
- The electric epilator is particularly suited for large areas.
Face:
- Use small amounts of sugar paste or tweezers for the eyebrows and upper lip.
- Avoid hot wax around the eyes and nostrils.
- Facial skin is thin: always carefully test the temperature and never apply wax to an area treated with retinoids.
Pro tip: For the complete guide to hair removal by area with adjustments according to skin type, consult the dedicated resource on the Hbps-beauty blog.
What treatments to apply after hair removal?
More than 70% of the final result depends on the quality of post-hair removal care, according to beauty professionals. Neglecting this step increases the risk of ingrown hairs, persistent redness, and uncomfortable skin.
During the first few hours:
- Soothe with an aloe vera gel or an alcohol-free azulene lotion.
- Avoid heat (hot bath, sauna, steam room) for 24–48 hours.
- No direct sun exposure on the treated areas for at least 24 hours.
- No deodorant or perfume on the underarms or bikini line on the same day.
During the next 48–72 hours:
- Moisturize daily with a light, non-comedogenic cream.
- Exfoliate gently 48–72 hours after the session to free growing hairs and prevent ingrown hairs.
- Apply sunscreen to exposed areas.
Recommended products: pure aloe vera, creams with panthenol, lotions without alcohol or perfume. For sensitive skin after hair removal, a dry skin facial ritual based on natural ingredients can complement body care.
Signs to watch for: redness that does not disappear after 48 hours, local heat, small pustules, intense itching. These symptoms may indicate a follicular infection—consult a doctor if they persist.
Pro tip: Insufficient maintenance between sessions (lack of hydration, absence of gentle exfoliation) increases the risk of ingrown hairs and reduces the effectiveness of the next session.
How to reduce pain during hair removal?
Pain is the main reason people give up on home hair removal. It can be managed.
- Breathe deeply when removing the strip. Exhaling during the pull reduces the perception of pain.
- Always stretch the skin with the other hand. This is the most effective way to reduce the pulling sensation.
- Pull parallel to the skin, never upward. An incorrect angle multiplies the pain and increases the risk of hair breakage.
- Apply a cold compress immediately after each pass to soothe the area.
- Take a warm shower before the session: heat dilates the follicles and makes pulling easier.
- Avoid sessions during your period: skin sensitivity increases in the days leading up to and during menstruation.
The speed of removal is the most underestimated technical factor. A slow and hesitant motion is systematically more painful than a quick, clean removal. Practice on a small area before tackling sensitive areas.
For very sensitive areas (full bikini line, dense underarms), enlisting a second person or entrusting the session to a professional remains a reasonable option. Some topical anesthetics exist, but their use should be occasional and based on medical advice.
How long do the results last, and what budget should you plan for?
| Method | Duration of results | Pain | Estimated cost per session |
|---|---|---|---|
| Razor | 1–3 days | None | Less than €1 |
| Depilatory cream | 4–7 days | None | €2–5 |
| Cold strips | 2–4 weeks | Moderate | €3–5 |
| Hot wax / roll-on | 2–4 weeks | Moderate to high | €3–10 |
| Sugar paste | 2–4 weeks | Moderate | €1–3 (homemade) |
| Electric epilator | 2–4 weeks | High at first | €30 investment, then almost zero |
| Home IPL | Gradual reduction (4–12 sessions) | Mild to moderate | €70 investment, low maintenance |
Budget tip: an electric epilator or IPL device pays for itself quickly if you regularly remove hair from several areas. For comparison, a series of sessions at a salon for the legs and bikini line can exceed several hundred euros a year. Consumables (wax, strips, spatulas) represent a recurring but manageable cost, especially if you make your own sugar paste.
Contraindications and warning signs to know
Certain situations make home hair removal inadvisable or dangerous.
Common contraindications:
- Damaged, injured, infected skin, or open wounds
- Taking photosensitizing medications (certain antibiotics, isotretinoin, acne medications)
- Retinoids applied to the area within the previous 48 hours
- Recent tanning or intense sun exposure (IPL only)
- Pregnancy (IPL and certain electric devices are not recommended)
- Varicose veins or blood clotting disorders in the affected area
Post-session warning signs:
- Intense pain that does not subside after 30 minutes
- Visible blisters or burns: cool with cold water, do not pop, consult a doctor if the blister is large
- Local fever, swelling, discharge: signs of infection, consult a doctor
- Widespread allergic reaction (hives, edema): antihistamine and seek medical attention quickly
In case of a burn or severe allergic reaction, consult a doctor or go to the emergency room without delay. Do not attempt to treat a deep burn or widespread reaction with home remedies.
Patch test reminder: apply the product to the inside of the forearm 24–48 hours before any new use of wax, sugar, or depilatory cream. Persistent redness or itching = contraindication for this product.
This article is for general information and is not medical advice. If in doubt about your situation (medications, skin condition, pregnancy), consult a dermatologist or doctor before any session.
What to do when things do not go as planned?
Ingrown hairs
Exfoliate gently 48–72 hours after hair removal with an exfoliating mitt or a low-concentration fruit acid (AHA) or salicylic acid (BHA) exfoliant. Apply warm compresses to open the follicles. If the hair is visible under the skin, use sterilized tweezers to gently free it. Never scratch with your fingernails. If the area becomes infected (redness, pus), consult a doctor.
Severe burns or redness
Cool immediately under cold water (no direct ice). Apply an aloe vera gel or alcohol-free soothing cream. Avoid any irritating products (perfume, acids) on the area for 48 hours. If a blister forms, do not pop it and consult a doctor if it exceeds 1 cm.
The wax does not adhere
- Check the hair length: if it is less than 3 mm, the wax cannot grip.
- Check the temperature: if it is too cold, the wax is too thick; if it is too hot, it runs without adhering.
- Make sure the skin is perfectly dry and free of oil. Apply a light dusting of talc if necessary.
- Turn the wax heater back on, wait 2 minutes, and test again on the wrist.
- If the wax remains ineffective, change the batch or product.
Classic mistakes never to repeat: applying wax over an area that has already been waxed, scratching off residue with your fingernails, or using a spatula that has already been used on another area.
What beauty professionals say
“There is no universally superior method. The right choice depends on the area, skin sensitivity, the nature of the hair, and pain tolerance. The tips from professionals all agree on one point: adapt the technique rather than looking for a miracle method.”
Practitioners emphasize three points that amateur guides often overlook. First, the quality of post-hair removal care determines more than 70% of the final result: poorly maintained skin between sessions produces more ingrown hairs and more uneven regrowth. Next, controlling the wax temperature remains the most neglected technical factor at home. Keeping the sugar paste between 40 and 45°C ensures both safety and optimal adhesion. Finally, pulling parallel to the skin, in the opposite direction of growth for classic wax and in the direction of growth for sugar paste, reduces hair breakage and micro-lesions.
Professionals also recommend using complete kits with a wax heater, pre-wax lotion, and post-wax care to reproduce a salon-like protocol at home. The difference between a successful home hair removal session and a disappointing one often lies in these preparation and finishing details, not in the method itself.
Key points
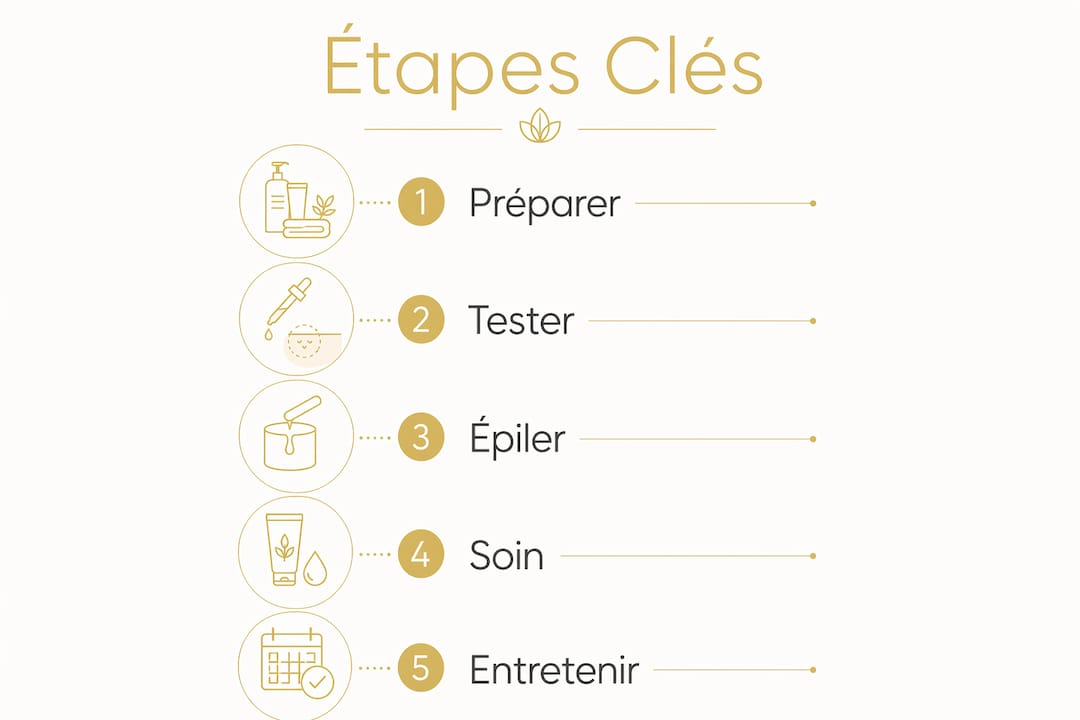
A successful home hair removal workflow relies on five actions in order: prepare the skin, test tolerance, use the correct motion for the area, treat immediately after, and plan the next session according to the duration of the results.
| Point | Details |
|---|---|
| Prepare the skin | Exfoliate 24–48 hours before, clean and dry skin on the day, hair at least 3–5 mm long. |
| Test before applying | Patch test 24–48 hours before with wax, sugar, or depilatory cream on the forearm. |
| Master the motion | Pull parallel to the skin, with a swift motion, pulling the skin taut with the other hand. |
| Treat after | Aloe vera or azulene immediately, gentle exfoliation 48–72 hours later, daily hydration. |
| Hbps-beauty | Offers wax heaters, epilators, pre- and post-hair removal care to equip your home kit. |
Is home hair removal really worth it?
The question that few articles frankly ask: at what point does home hair removal reach its limits? The honest answer is that the home technique works very well for the legs, arms, and underarms once you have acquired the right reflexes. For the full bikini line or face, the margin for error is narrower and the pain more pronounced. This is not a reason to give up, but a reason to progress area by area.
What guides often omit: consistency counts more than the chosen method. A person who waxes their legs with a roll-on wax every three weeks with good post-session care will achieve better long-term results than someone who uses a high-end IPL device irregularly. The equipment does not compensate for the protocol.
For high-risk areas (full bikini line, very reactive skin, history of reactions), entrusting the session to a professional remains the most sensible decision. Not because home hair removal is dangerous in itself, but because certain areas require a level of precision and mastery that is acquired over time.
Where to find a reliable hair removal kit to get started?
Choosing the right equipment makes all the difference between a frustrating session and results close to those of a salon. Hbps-beauty offers a selection of hair removal products suited to all skill levels: compact wax heaters, hypoallergenic wax refills, electric epilators with interchangeable heads, and pre- and post-hair removal care (aloe vera lotions, azulene gels, gentle exfoliants).

To choose your kit according to your use: if you regularly remove hair from several areas, a wax heater with complete accessories is the most cost-effective investment. If you are a beginner or looking for a solution without equipment, cold strips or a sugar paste kit are sufficient to start. For a lasting reduction in hairiness, the home IPL devices available in the shop offer progressive results over several weeks.
Browse the Hbps-beauty shop to compare the available ranges, check compatibility with your skin type, and take advantage of customer service to guide you toward the product best suited to your routine.
Useful sources and references
The information in this guide is based on sources specializing in beauty and skincare. Here are the main references to explore each aspect of the home hair removal workflow in more depth.
- Beauteshop.com — Hair removal: maintaining and extending care at home: data on the importance of post-hair removal care and the timing of exfoliation.
- Beauteshop.com — Homemade sugar hair removal: detailed recipe, application technique, and common mistakes with sugar paste.
- Le Journal Féminin — Homemade Oriental Wax: safety protocol, working temperature, and patch test for sugar paste.
- Institut Massag — Method and Tool Guide: comparison of methods by area and skin profile, professional recommendations.
- Passeport Santé — Hair Removal Techniques and Methods: placement of cold strips and general comparison of methods.
- Philips France — Hair Removal Methods Guide: compatibilities and limitations of at-home IPL by phototype.
- Aline Archimbaud — Gentle and Effective Hair Removal at Home: skin preparation, natural recipes, and post-hair removal care.
- Hbps-beauty Blog — At-Home Hair Removal Guide by Area: tailored recommendations for each body area.
- Hbps-beauty Blog — Hair Removal Devices: How They Work: technical operation of epilators and at-home IPL devices.
Essential Reminder: always perform a patch test 24–48 hours before using a new product, and consult a dermatologist if you have any doubts about your skin type, medications, or an unusual reaction. For sensitive skin, a beauty routine tailored to sensitive skin can be a useful addition to your post-hair removal routine.
Recommendation
- At-Home Hair Removal Guide: Methods and Care by Area – HBPS Beauty & Fashion
- Essential Tips for a Successful Professional Hair Removal Treatment – HBPS Beauty & Fashion
- At-Home Skincare Routine Guide: A Simple Method – HBPS Beauty & Fashion
- Hair Removal Devices: How They Really Work – HBPS Beauty & Fashion